Showing posts with label VeganMoFo. Show all posts

Monday, October 15, 2012

A Birthday Cake Fit for a Princess!

(Cross-posted from Sexy Vegan Mama)

We're halfway through Vegan MoFo, and still going strong! Have you found something deliciously new this month?

Before I forget, please, please, pretty please go to this link and VOTE for my blog in the Circle of Moms Top 25 Food Allergy Moms blog contest! No registration required -- just a click! Remember, you can vote once EVERY 24 hours. The contest is winding down, and as a late nomination, I could use some help getting into the Top 25. Thank you!

Princess came home for her birthday weekend. I couldn't be more proud of that young lady... She's anxiously waiting to hear back on her applications to vet school, working, finishing her senior year at university with a major in Wildlife Ecology. It's a marvel to me that I had a hand in producing this amazing human being!


Anyway, for her 22nd birthday, I asked her what kind of cake she wanted. "Chocolate!" she said, which wasn't a big surprise. That girl loves her chocolate. Who doesn't?! "And," she added, "could you make that peanut butter cream frosting you did that one time?"

Ah, yes... That one time. See, it was The Dude's birthday, and our family was spending the weekend at Birch Bay. Our hotel room had a kitchen, so I'd packed everything I'd need to make a fabulous cake and frosting -- with the exception of the vegan margarine, which I didn't want to hassle with chilling during the several-hours-long drive. I figured I'd just pick some up at the local grocery when we arrived.

Except... none of the local groceries HAD vegan margarine. How was I going to make a creamy vegan frosting, with no margarine? I scanned our grocery booty, and spotted the creamy peanut butter. Hey, I thought, margarine is basically just fat, and peanut butter is full of fat. I wonder... It didn't have the exact consistency I wanted, but it worked well enough to cover the cake.

This time, I solved the consistency problem by adding a bit of margarine to make it even creamier and "buttery."

I was all prepared to mix up two layers of chocolate cake when inspiration struck. What if... What if I put peanut butter IN the cake?!

The result was a zebra-striped peanut butter and chocolate cake, and it was divine. The technique to produce zebra stripes in the cake is easy-peasy, and you can find many, many tutorials online, if my photos and description leave anything to be desired.

Happy baking!


Peanut Butter Chocolate Zebra Cake with Peanut Butter Cream Frosting

Peanut Butter Cake Ingredients:


1 1/2 c. unbleached flour
1 c. cane juice crystals or natural sugar (I use Zulka)
1/2 t. baking soda
1/2 t. fine sea salt
1 c. cold water
1/2 c. creamy peanut butter
1 T. vanilla
2 T. lemon juice


Chocolate Cake Ingredients:

1 2/3 c. unbleached flour
1 c. cane juice crystals or natural sugar (I use Zulka)
1/4 c. cocoa powder
1 t. baking soda
1/2 t. fine sea salt
1 c. cold strong coffee or espresso or water
1/3 c. canola or olive oil
1 t. apple cider vinegar
1/2 t. vanilla extract


Peanut Butter Cream Frosting


1/2 c. vegan stick margarine
2/3 c. creamy peanut butter
1 lb. vegan powdered sugar
1/8 - 1/4 c. vanilla soy milk


Preheat oven to 375 degrees.

In a large mixing bowl or with your stand mixer, combine the following Peanut Butter Cake ingredients: flour, cane juice crystals, baking soda, and salt, stirring until well-combined.

Blend in cold water, peanut butter, vanilla and lemon juice. Beat until light, airy and creamy.

Set aside batter and begin Chocolate Cake:

In a large mixing bowl or with your stand mixer, combine the following Chocolate Cake Ingredients: flour, cane juice crystals, cocoa powder, baking soda and salt, stirring until well-combined.

Blend in coffee or water, oil, vinegar and vanilla. Beat until light, airy and creamy.

Grease and flour two 8-inch round cake pans.

Tip #1: Spray pans with non-stick cooking spray and use a paper towel to evenly disperse the spray over the pans' surfaces, then dust with flour.

Tip #2: Cut two waxed paper circles just smaller than the bottom of the pans, then insert into bottom of pans before pouring batter. Make sure to smooth out any air bubbles before filling. The waxed paper will ensure easy removal when the cakes are turned out.

Pour 1/4 cup Peanut Butter Cake batter into the center of the first pan, and 1/4 cup Chocolate Cake batter into the center of the second pan.


Pour 1/4 cup Chocolate Cake batter directly on top of Peanut Butter Cake batter in first pan, and 1/4 cup Peanut Butter Cake batter on top of Chocolate Cake batter in second pan.


Continue adding 1/4 cup of alternating batter into each pan until all batter is dispersed, and the batter has "smooshed" out to fill the edges of the pan.


On a flat surface, spin each cake pan to push the batter even farther out to the edges. The center of the cake tends to rise more than the edges, so this will help produce a more even cake top.


Bake for 35-40 minutes, or until cakes pull away from edges of pan and a toothpick inserted into the middle of each cake comes out clean.

Allow cakes to cool for 10-15 minutes before turning out onto a cooling rack.

While cakes are cooling, make your frosting:

With a hand mixer or stand mixer, cream together margarine and peanut butter until smooth and creamy.

Add powdered sugar, turning mixer down to low speed, and blend in. The mixture will be a bit dry and crumbly -- don't freak.

Add 1/8 cup soy milk and blend in. If you want your frosting softer and lighter, blend in soy milk, 1 tablespoon at a time, until frosting reaches desired consistency.

Return to cooled cakes. Remove wax paper (if used) from bottoms of cakes and flip one onto a serving plate or covered cake circle. Using a serrated knife, carefully level the cake.

Fill a decorator's bag with frosting and pipe a thick border around the top of the leveled cake. I use a Wilton #21 star tip for this.

Spoon out a generous amount of frosting into center of cake and spread a thick layer to the piped border. This will be your cake "filling."

Flip the second cake and place directly on top of first cake. Using your serrated knife, level off the second cake.

Cover the entire cake with a crumb coat and chill for 30-45 minutes.


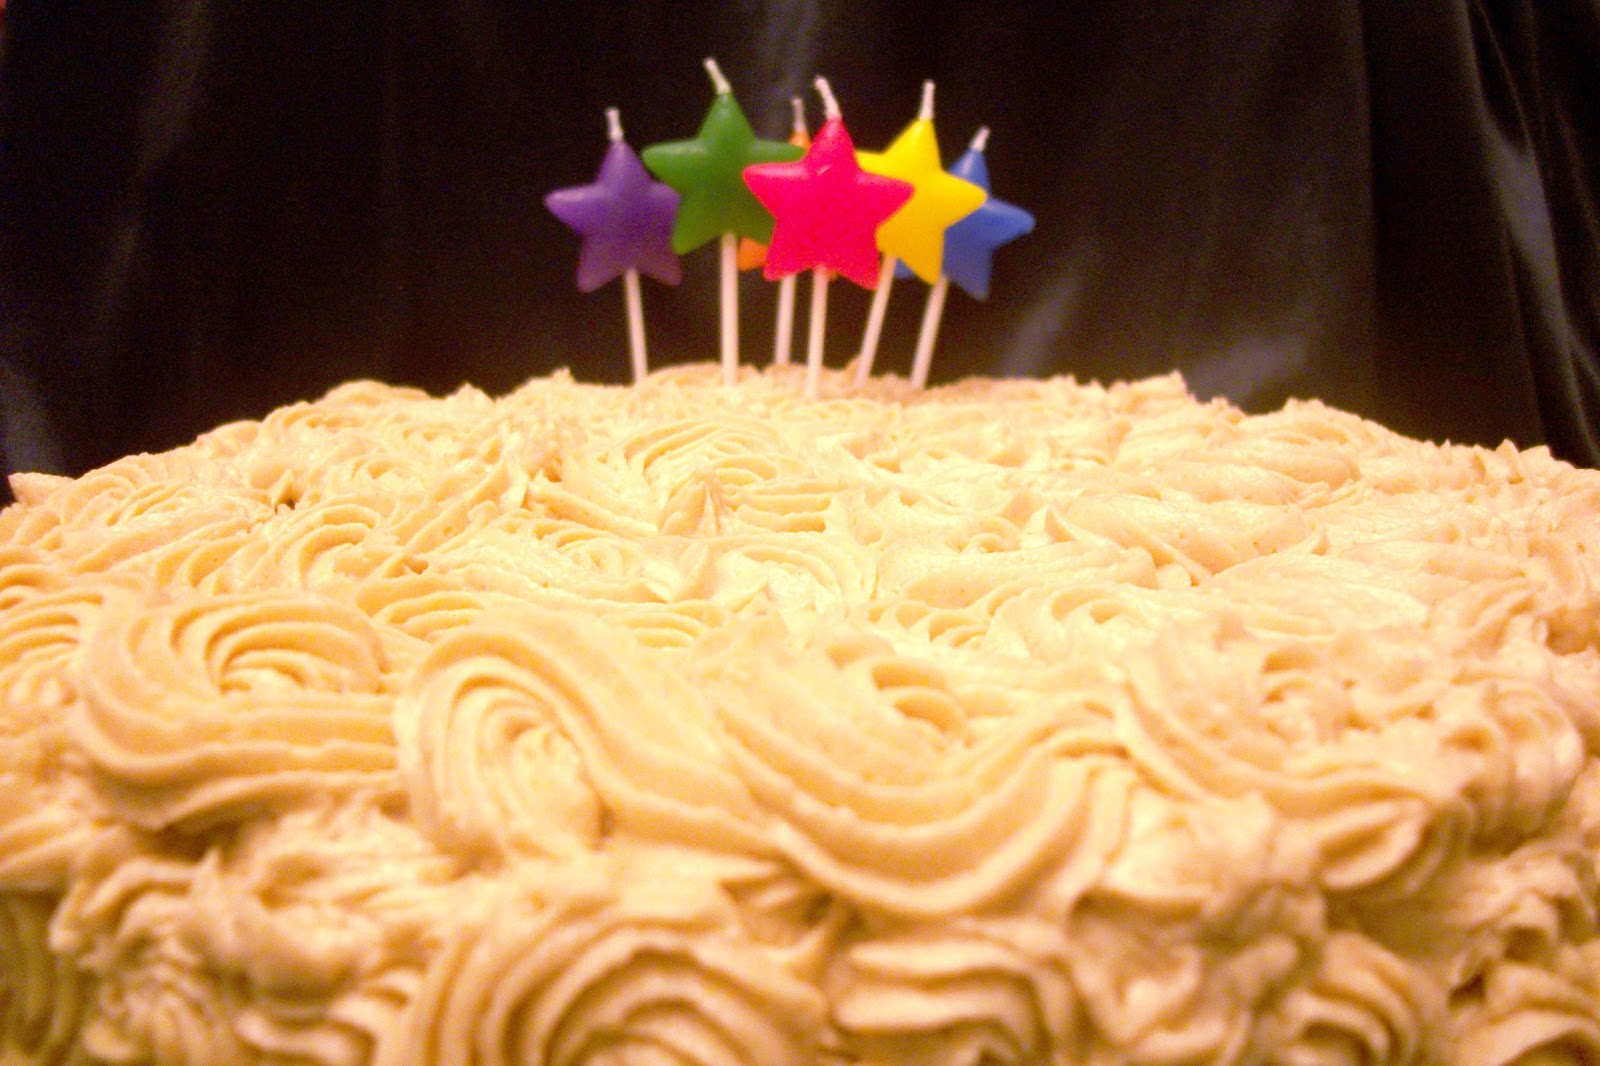
To cover the cake, I used my Wilton #21 star tip and a decorator's bag to pipe random scrolls onto the top and sides of the cake.

Note: I actually ended up using one-and-a-half batches of Peanut Butter Cream frosting.


Princess picked out her own candles. I must say, I agree with her selection, as she's certainly a STAR!


"Like" The Gonzo Mama on Facebook, and don't forget to see what's cooking with Sexy Vegan Mama today!


Thursday, October 11, 2012

Oh, Boy - Obento! Bow Tie Bear Bento

I'm cross-posting this from Sexy Vegan Mama, because it's simple enough that anyone can do it, and cute enough to share!

Happy Vegan MoFo!

Let's make one thing clear... I'm NOT one of those crafty moms who scrapbooks, decorates my house for every season, turns vintage suitcases into shabby chic conversation pieces, or makes masterpieces of boxed lunches.

I'm just not.

What I AM is a mama who's always looking for fun, easy ways to get food into my kids' bodies, while acknowledging our entire family's hodgepodge of food restrictions:

I'm vegan, Pepper has digestive issues (we're still working on identifying those -- she's heading toward a referral to a GI specialist), Curlytop and Snugglebug are allergic to Red Dye 40, and poor little Snugglebug can't have fruit if it's juiced or dried due to the change in sugar concentration.

(Oh, by the way, please go VOTE for this blog in the Circle of Moms Top 25 Food Allergy Mom blog contest! Sexy Vegan Mama was a late nomination, and there are only a few days left of the contest, so I have a lot of catching up to do! You can vote once every 24 hours. Thank you!)

I also don't have a ton of time on my hands, so when I see those crafty moms cranking out cute-as-a-button bentos, I'm absolutely floored that anyone, anyone would spend so much time creating a meal that's going to roll around in a backpack for a few hours before its precious owner gets around to eating it.

Still, there's something to be said for a cute lunch when you're a pigtailed princess in kindergarten or the first grade... So I made a quickie little bento that's so simple, even a caveman mom of seven can do it.


About the bento boxes -- I picked them up in a Tokyo hotel gift shop, and I'm sure I paid too many Yen for them, but they're adorable, and they've held up well over the past couple years, with just a bit of scratching to the adornment on the top lid. I haven't found the exact same ones online yet, but these are similar in design, except they include a spoon, rather than chopsticks. Plus, they're less than ten bucks. Woohoo!

(Read about my adventures in Japan here.)


They have a shallow tray on the bottom with a lid that fits snugly inside the edges, then a deeper tray on top, with removable partitions and a snug-fitting lid. On top of all of it is a clear, shallow, hard plastic top which creates a storage area for small plastic chopsticks (included in the set) or other tiny utensils. (I'm fond of keeping and reusing for lunches the diminutive plastic forks which come in Simply Asia's Sesame Teriyaki noodle bowls (they're vegan!), which I pack when I'm traveling to places where I'll be cooped up in a hotel room or where vegan options are hopeful, at best.)


Anyway, to make this bento, I:


  • Cut vegan whole wheat bread slices with a bear-shaped cookie cutter (that link goes to the exact one I use)
  • Made a sandwich with PB & J (no "J" for Snugglebug, as she can't digest the sugar, and if your kid's school has a "no nuts" policy, you can use tahini, or make whatever sort of sandwich your progeny will eat)
  • Used a wooden skewer to pierce the bread where the eyes, nose and bow tie would be to help the "decorations" stay put better
  • Placed a dried currant in each of the holes for the eyes and nose (I had to take Snugglebug's currants out before sending her off to school... She said, "Mom! Are you trying to make me sick? You know I can't have RAISINS!" I tried to argue, "They're currants, Honey, and they're just for the pictures," but... Cue dramatic meltdown.)
  • Placed two dairy-free chocolate chips, point-to-point, at the bear's neckline for his bow tie
  • Tucked cut broccoli florets around the bear
  • Used an inexpensive cupcake paper to line the small compartment, then filled it with slivered almonds and dairy-free chocolate chips (I know they make fancy, colorful bento liners, but I'm cheap, and I always fail to plan ahead. Cupcake papers work fine.)
  • Filled the bottom tray with baby carrots, garbanzo beans and fresh peas


That's it! Is that the simplest bento ever, or what?!


"Like" The Gonzo Mama on Facebook, and don't forget to see what's cooking with Sexy Vegan Mama today!


Saturday, November 27, 2010

Sexy Vegan Mama: Pumpkin Cinnamon Rolls

My family loves cinnamon rolls, but I think they're sort of... *yawn.* When I was shopping for ingredients for my pumpkin pie, I picked up a 30-ounce can of pumpkin pie filling instead of a 15-ounce can, like the recipe called for, because it was cheaper. I figured I'd think of something to do with the other 15 ounces.

What I ended up with is nothing short of a miraculous revamping of the same-old cinnamon rolls.


Sexy Vegan Mama’s Pumpkin Cinnamon Rolls

Ingredients:

1 1/8 c. warm water (“baby bath water” warm - not too hot, or you'll kill the yeast)
1 1/2 T. dry yeast
2 T. oil
1 – 15 oz. can pumpkin pie filling

6 to 7 c. unbleached white flour
1 T. salt
2 T. evaporated cane sugar crystals or vegan sugar

2 to 4 T. vegan stick margarine, softened

1/4 c. evaporated cane sugar crystals or vegan sugar
1 t. ground cinnamon

Glaze:

Blend until smooth or desired consistency:

2 to 3 c. powdered sugar
2 to 3 T. vanilla soy milk
Add more powdered sugar or soy milk if necessary.

Directions for rolls:


Preheat oven to 375 degress.

In a small bowl, sprinkle yeast over water and allow to dissolve. Add oil and pumpkin, mix thoroughly.

In a large bowl, combine and mix flour, salt and sugar. Make a “well” in the middle of the dry mixture, then add liquid mixture. (See photos of this well/liquid thing if you don't get what I'm saying, here.) Stir liquid into flour until it’s too stiff to stir with a spoon, then oil your hands and knead the dough.

Add a little more flour or water if necessary to achieve desired consistency. Dough should be slightly sticky, but not totally clinging to hands or bowl. When dough forms easily into a ball, remove from bowl, put about a teaspoon of oil into the bottom of the bowl, and roll the ball of dough in the oil to coat it.


Allow to rise until doubled in size – about an hour.

Punch the dough down, divide in half and roll out on a floured board into two large rectangles – about 15” x 9”. Spread a layer of softened margarine over each rectangle.


Mix sugar and cinnamon, then sprinkle over buttered rectangles.


Starting at the wide end, roll the dough tightly into a long roll.

Slice, using a serrated knife, into 12 rolls. Place the rolls into oiled muffin tins and let rise for about 20 minutes.


Bake until golden brown on top, about 20 to 30 minutes.

Top with glaze while warm.


Sexy Vegan Mama: No-Tofu Pumpkin Pie

Around October of each year, I begin developing a strong, intense craving for pumpkin pie, and it doesn't subside until I break down and actually buy silken tofu (which I rarely use) sometime in November and find a recipe for pumpkin pie. This year, I was determined to find a recipe that didn't call for the slimy, squishy soy stuff. I found this one at Vegweb.com, but I wasn't crazy about the flax seed and wheat germ crust, so I used my tried-and-true Sexy Vegan Mama's Perfect Pie Crust. Also, I used spiced pumpkin pie filling instead of pumpkin and pumpkin pie spice, and made a few other modifications.

Here's the recipe as I modified it:

Sexy Vegan Mama's No-Tofu Pumpkin Pie

You’ll need:

1 – 9” pie pan
1 pie crust (I used my recipe)

Ingredients:

1 t. lemon juice
1 c. vanilla soy milk

1/4 c. unbleached white flour
1/4 c. oil
3/4 c. evaporated cane juice crystals or vegan sugar
1/4 t. salt
1 – 15 oz. can pumpkin pie filling
1 t. molasses

Directions:

Preheat oven 450 degrees.

In a small bowl, combine lemon juice and soy milk. Allow to curdle.

While waiting for the liquid to curdle, mix flour and oil into a paste, then mix in sugar and salt, blending thoroughly. Stir in pumpkin pie filling and molasses.

Add curdled soy milk and stir until smooth.

Pour into pie shell and bake for 15 minutes at 450 degrees, then turn oven down to 350 degrees and bake for 40 to 50 minutes longer. The pie filling may be bubbling… be careful taking it out of the oven.


Let the pie cool thoroughly before serving. It’s even better if you put it in the refrigerator to chill before serving.


Sexy Vegan Mama: Deep-Dish French Apple Pie

Ah... Apple pie. Whether you make it with a traditional full-top crust, a lattice-top crust, or a French top, it's a perfect, tasty way to pack a few cubic feet of cellulite on your butt. My family likes a French topping, so that's the recipe I'll share with you.

First, if you haven't already, head on over to learn how to make my Sexy Vegan Mama's Perfect Pie Crust.


Sexy Vegan Mama's Deep-Dish French Apple Pie

You'll need:

A 9.5" deep-dish pie pan
A single pie crust (See my recipe)

Ingredients:

5 to 7 large (or 10 to 12 medium) Granny Smith apples, peeled and sliced (you'll need about 12 cups after slicing)

1 1/2 c. evaporated cane juice crystals or vegan sugar
1/2 c. unbleached white flour
1 t. ground nutmeg
1 t. ground cinnamon

Topping:

1 c. unbleached white flour
1/2 c. evaporated cane juice crystals or vegan sugar
1 stick vegan margarine

Directions:

Preheat oven to 425 degrees.

Combine sugar, flour, nutmeg and cinnamon, then stir into apple slices. Transfer sliced apples into prepared pie crust (the apples should form a small mountain - they cook down a lot when baking!).
You can add a few dollops of vegan margarine if you like it extra-buttery.


Prepare topping by combining flour and sugar, then cutting in margarine until crumbly.


Spread topping evenly over apples in pie shell. Bake 35 minutes, then cover entire top with foil and bake another 10 to 15 minutes.

This pie rocks served warm! The experts say so:

Sexy Vegan Mama: Perfect Pie Crust

It's a learned skill, making the perfect pie crust, but it's really the key to making perfect pie. I learned the basics by watching my mom in her kitchen, and developed my vegan baking skills later as a young adult, working in her bakery. It's not as hard as you might think to turn out a flaky, tasty crust without using butter. Check it out:


Sexy Vegan Mama’s Perfect Pie Crust
(makes two 10-inch pie crusts)

Ingredients:

1 cup vegan stick margarine (I use Nucoa)
2 2/3 c. unbleached white flour
1 t. salt
7 to 8 T. cold water

In a large mixing bowl, combine four and salt. Cut margarine into flour mixture using a fork or pastry blender. Knobby little pieces will form, and you want them about the size of petite peas.

Add water, one tablespoon at a time, tossing with a fork until all the dough is moistened and sticks to itself more than it does the bowl. It may take more or less water than the recipe calls for.

Roll the dough into a ball and remove it from the bowl. Divide the ball in half, forming two balls, then flatten on a flour-covered cutting board. Use a floured rolling pin on each flattened round to spread the dough into a 12” circle (13-14” for deep-dish pans).


To transfer the crust into the pie pan, fold it carefully in fourths, place it in the bottom of the pan, then gently unfold it. Using a knife or scissors, trim the crust to about a half-inch around the edge of the pan.


 Use your fingers to tuck the excess edges under.

Using your thumb and forefingers, gently pinch the thick edge of the crust all the way around the rim of the pan, creating a fluted edge.


Use a fork to prick the bottom and sides of the crust to prevent puffing while it’s baking.


If you are pre-baking your crust: Bake for 8 to 10 minutes in an oven preheated to 475 degrees.

If you are only making one pie: Seal the unused, unbaked crust in plastic wrap or a large zipper bag and put it in the freezer. It will keep up to three months if well-sealed. Let it thaw completely before baking.

Tuesday, November 23, 2010

It's a Vegan Thanksgiving, Sexy Mama! Recipe + Video: Tomato Sesame Pepper Rolls

Want to find more great vegan bloggers? Check out the 2010 blogroll at VeganMoFo!

These rolls are my family's favorite. I always make a double batch because I know 24 rolls won't be enough. This recipe can also be formed into a loaf (great for sandwiches!) or two bread braids. Also, try making soft pretzels out of it for a tasty change.


Tomato Sesame Pepper Rolls
(makes 24 small rolls)

Ingredients:

1/2 c. warm water (you’re looking for “baby bath water” warm – if it’s too hot, it will kill your yeast)
1 1/4 t. yeast
1 1/4 c. canned diced tomatoes, juice included (I like to use petite cut, but you can use regular diced)
3 T. oil

1 t. salt
2 T. raw sugar or evaporated cane juice crystals
1/4 t. ground black pepper
1/4 t. ground red pepper
1 1/2 t. black sesame seeds
1 1/2 t. white sesame seeds
2 c. whole wheat flour
2 c. unbleached white flour

Directions:

Pour water into a medium-sized mixing bowl. Sprinkle yeast over top and allow a few minutes to dissolve. (Tip: Start measuring your dry ingredients into a large mixing bowl while you wait.) Stir dissolved yeast into water, then mix in tomatoes and oil.

Combine dry ingredients in a large mixing bowl and mix thoroughly.

Using a spoon, make a “well” in the middle of the dry ingredients.
Well, well, well...

Pour the liquid mixture into the well.


Stir wet and dry ingredients together until the dough becomes too stiff to stir – then, it’s time to get your (clean!) hands dirty. (Tip: Pour a little oil on your hands first to help prevent the dough from sticking to them.)
Stirring up trouble?

Using your hands, knead dough until it’s elastic and not sticking to the bowl or your hands. You may need to add a bit more flour or water at this point to achieve the proper texture.

When the dough is properly elastic, form it into a ball. Put a little oil in the bottom of your bowl, place the top of the dough ball in the oil, coating it, then turn the ball upside down. You’re doing this to prevent the dough from drying out while it’s rising.


Allow the dough to rise in a warm place until it’s doubled in size (usually about an hour), then punch down and divide into 24 equal sections. Then, form your rolls. Here’s my video tutorial on how to do it:


Now, I like to put my rolls in muffin tins to give them a uniform shape, but you may place yours on a baking sheet or in a baking pan. Just allow enough space around each roll for the second rise.

This is a good time to preheat your oven to 375 degrees.

Allow the formed rolls to rise again to double their size (Note: Keep an eye on them – the second rise will take only about half as long as the first), then bake for 15 to 20 minutes. The baking time depends on the size of the rolls, and they will be done when they begin to brown slightly on top.

More holiday recipes:
Oat, Seed & Vegetable Loaf
Roasted Garlic & Basil Mashed Yams
Apple Almond Stuffing (or Dressing)


Monday, November 22, 2010

It's a Vegan Thanksgiving, Sexy Mama! Recipe: Apple Almond Stuffing (or Dressing)

While everyone is carrying out the "stuffing" vs. "dressing" debate (click over to participate in the poll and make your preference known!), I'll state for the record we call it "stuffing" in our house, even though it's not shoved into a bird's butt.

I happen to think it refers to the manner in which it gets "stuffed" in my children's mouths before we've even finished saying, "Amen" after the blessing. Just a guess.

From what I gather, the preference for saying either "stuffing" or "dressing" depends, largely, on where you're from - or where your ancestors hail from. I'm reading, for example, Southerners tend to use "dressing," whether it's cooked inside a carcass or not.

Anyway... here's how I make it:

Apple Almond Dressing or Stuffing

Ingredients:

1 – 12 oz. package of seasoned vegan dressing mix (I used to use Mrs. Cubbison’s, but now it contains whey. Anyone have a good commercial recommendation?)

1/2 c. slivered almonds
1 c. chopped celery
1 c. chopped onion
1 c. chopped apple (I insist on using Granny Smiths here. You may experiment, if you like, but I won’t be responsible for the outcome.)

1/2 c. vegan stick margarine, melted

1 to 1 1/2 c. vegetable stock or broth (Optional: Substitute 1/2 cup apple or pineapple juice for half the broth)

Directions:

Preheat oven to 350 degrees.

Pour everything in a huge mixing bowl and stir, stir, stir… You don’t want any dry bread pieces!

Dump the mixture into an oiled 9” x 13” casserole dish, cover with foil and bake for 30 to 35 minutes.

Tip: Plan ahead and make this up the night before. Keep it covered with foil in the refrigerator and just add another five or ten minutes when baking to make sure it’s heated through.


More holiday recipes:
Oat, Seed & Vegetable Loaf
Roasted Garlic & Basil Mashed Yams
Tomato Sesame Pepper Rolls


Poll: Dressing vs. Stuffing - Does It Matter if It's Shoved Into a Bird's Butt?

Today, The Gonzo Mama asks that age-old question: Do you still call it "stuffing" if it's not shoved into a dead bird's butt? Or do you call it "dressing" instead?


(Whatever you call it, click here to see how The Gonzo Mama makes it!)

Take the poll!


Note: There is a poll embedded into this post. If you can't see it, please visit TheGonzoMama.com directly from your computer.

It's a Vegan Thanksgiving, Sexy Mama! Recipe: Roasted Garlic & Basil Mashed Yams

This recipe is part of my VeganMoFo posting.

I know what those Skinny Bitches say about olive oil... They say don't use it. They say to use coconut oil, instead.

For the record, I'm not a skinny bitch, a doctor, a dietitian or even a nurse. I've taken a few vegetarian nutrition courses, studied vegan nutrition independently, and worked in a natural foods store for a minute. I pretty much don't know squat about the health risks or benefits comparison between coconut and olive oil. I do have some coconut oil in my pantry, just in case those Bitches know what they're talking about.

Except... Except there are some times when only a full-flavored extra virgin olive oil will do. Am I wrong?

I don't want to dip my marvelous, homemade, crusty bread in coconut oil, okay? And I don't want to toss my pasta primavera in anything but fresh garlic and EVOO. And I sure as heck don't want to roast a bulb of garlic with anything but a high-quality olive oil, no matter what the Bitches say.

When attempting this recipe, please stick to the tried-and-true olive oil. If you experiment with coconut, canola, almond, sesame, or some other oil, I can' t be held responsible for what disaster will certainly befall you.

Also, plan ahead for this recipe... You'll need an hour to roast the garlic before you even get started on the rest!

Roasted Garlic & Basil Mashed Yams

1 bulb garlic (or two, if ya like da gar-lique!)
1 T. olive oil

4 to 6 good-sized yams or sweet potatoes

1 handful fresh basil leaves, chopped

1/4 to 1/2 c. vegan stick margarine (it’s up to you, your taste buds and your waistline to decide)
About 1/2 c. nondairy milk (I use soy milk)

Sprigs of fresh basil for garnish (optional)


Roast the garlic:

Preheat oven to 350 degrees.

Peel the outermost, papery layers off the garlic bulb. Slice pointed top off bulb, exposing cloves.


Place on a sheet of foil and pour olive oil over top of cloves. Make sure each of the cloves gets oil into it. Then, wrap the bulb up in the foil like a chocolate kiss.


Bake foil-covered bulb for 45 to 60 minutes. Garlic is fully roasted when the bulb is soft and gives way easily when squeezed.


Prepare the yams:

Wash and peel yams, then cut into small chunks – no bigger than an inch and a half or so. Toss into a stock pot and add enough water to cover the yam pieces. Bring the pot to a boil, then continue to cook yams until tender, about 15 minutes or so, depending on the size of your chunks. They should pierce easily with a fork, but not be falling apart on their own.

Use a colander to drain yams, then return them to the pot while they're still hot. Add the stick margarine.

While the margarine is melting, squeeze roasted garlic from the bulb into the pot. Mash the yams with a fork or masher, then blend in garlic and margarine (I use a handheld blender/mixer for this!), adding 1/8 cup of soy milk at a time until mixture is desired consistency.

Garnish with a sprig of fresh basil when serving, if desired.

More holiday recipes:
Oat, Seed & Vegetable Loaf
Apple Almond Stuffing (or Dressing)
Tomato Sesame Pepper Rolls

Sunday, November 21, 2010

I've Been a Lazy VeganMoFo

My beloved mighty, mighty Goats were ousted from playoff action yesterday. I don't wanna talk about it.

Let's talk about VeganMoFo, instead.

What is VeganMoFo? It's a celebration and collaboration of vegan bloggers, who celebrate Vegan Month of Food (VeganMoFo) by blogging and writing about vegan food - making it, eating it, discovering it, remembering it, the tools we use to make it...

It's a beautiful thing, really.

But I've been lazy about it. In fact, I've been so busy this month, I haven't even really cooked my family a decent meal. That's all about to change. There's no excuse for no cooking and baking during the week of Thanksgiving.

I missed VeganMoFo's official signup window, so I'm going rogue and getting things started with my recipe for this year's turkey alternative, Sexy Vegan Mama's Oat, Seed & Vegetable Loaf. Join me, won't you?

Stick around for Roasted Garlic & Basil Mashed Yams!

VeganMoFo image from VeganMoFo.wordpress.com